こんにちは、情報システム部の高野です。
今回は、HoloLensでオブジェクトの拡大縮小をします。
しかも等倍ではなくXYZ軸自由に拡大縮小できるように作ります。
HoloLensで拡大縮小する方法は、いくつかあります。
・声で指示する方法(以前テレビでやってました)
・HoloLensにプリインストールされているActiongramの様にスライダーのようなもので操作する方法
・下記ブログのようにワイヤーフレームにハンドルを付けて操作する方法
(こちらのブログを大分参考にさせていただきました)
blog.d-yama7.com
今回は、変倍ということもあり3番目の方法でやってみます。
準備
まずプロジェクトの準備は、以前と同様です。
HoloToolkitをimportしプロジェクトの設定をします。
HololensCamera・InputManager・DefaultCursorをHierarchyウィンドウに配置します。

拡大縮小するオブジェクトとワイヤーフレームの配置
Cubeの配置
まず拡大縮小するオブジェクトを配置します。
これは何でも良いのですが、今回はCubeを配置します。
Hierarchyウィンドウで右クリックし「3D Object」→「Cube」を選択して
Cubeオブジェクトを配置します。
配置されたCubeを選択しInspectorウィンドウで位置と大きさを変更します。
Position Z=1
Scale X/Y/Z=0.2
適当にMaterialを用意しCubeに色を付けておきます。
(ワイヤーフレームを緑にするのでそれ以外の色がいいです)
ワイヤーフレームの配置
ワイヤーフレーム用のShaderを作成します。
ProjectウィンドウのAssetsフォルダ上で右クリックし
「Create」→「Shader」→「Standard Surface Shader」を選択します。
作成されたShaderの名前をWireに変更しておきます。
Wireシェーダーを右クリックし「Open C# Project」を選択します。
VisualStudioでWire.shaderを開きこちらを参考に編集します。
次にMaterialを作成します。
ProjectウィンドウのAssetsフォルダ上で右クリックし
「Create」→「Material」を選択します。
Materialの名称をWireに変更します。
Wireマテリアルを選択しInspectorウィンドウの上部にある
Shaderプルダウンから「Custom」→「Wire」を選択します。
LineColorを緑に変更します。

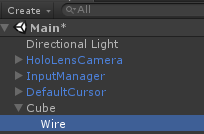
HierarchyウィンドウのCubeを右クリックし子オブジェクトとしてCubeを作成します。
名称をWireに変更しておきます。
拡大縮小用のハンドルCubeとスクリプトの作成
リサイズハンドルを作成する
HierarchyウィンドウのWireオブジェクトを右クリックし
「3D Object」→「Cube」を選択します。
名称をResizeHandle1に変更します。
Position X=0.5 Y=0.5 Z=-0.5
Size X/Y/Z=0.05
に変更します。
緑色のマテリアルを作成しResizeHandle1に関連付けます。
これを各頂点にコピーすることになるのですが
動きを付けてからにします。
スクリプトを作成する
Projectウィンドウで「C# Script」を作成し
名称をResizeControllerに変更します。
これをResizeHandle1オブジェクトに関連付けておきます。
ResizeController.csをVisualStudioで開き以下の様に修正します。
using HoloToolkit.Unity.InputModule;
using UnityEngine;

public class ResizeController : MonoBehaviour, IInputHandler, ISourceStateHandler
{
    private GameObject targetObj;
    private bool isHold;
    private IInputSource currentInputSource;
    private uint currentInputSourceId;
    private Vector3 startHandPos;
    private Vector3 axisVect;
    private Vector3 startScale;

    // Use this for initialization
    void Start()
    {
        // 本来は外から設定した方が良いです
        targetObj = transform.parent.parent.gameObject;
    }

    // Update is called once per frame
    void Update()
    {
        if (!isHold) return;

        Vector3 handPos;
        currentInputSource.TryGetPosition(currentInputSourceId, out handPos);

        var diff = handPos - startHandPos;

        // 各軸ごとの方向を取得
        var xVect = axisVect.x >= 0 ? 1 : -1;
        var yVect = axisVect.y >= 0 ? 1 : -1;
        var zVect = axisVect.z >= 0 ? 1 : -1;

        targetObj.transform.localScale = startScale + new Vector3(diff.x * xVect, diff.y * yVect, diff.z * zVect);
    }

    public void OnInputDown(InputEventData eventData)
    {
        if (!eventData.InputSource.SupportsInputInfo(eventData.SourceId, SupportedInputInfo.Position))
            return;

        if (isHold) return;

        isHold = true;
        InputManager.Instance.PushModalInputHandler(gameObject);

        currentInputSource = eventData.InputSource;
        currentInputSourceId = eventData.SourceId;

        currentInputSource.TryGetPosition(currentInputSourceId, out startHandPos);

        startScale = targetObj.transform.localScale;

        axisVect = transform.position - targetObj.transform.position;
    }

    public void OnInputUp(InputEventData eventData)
    {
        if (!isHold) return;

        isHold = false;
        InputManager.Instance.PopModalInputHandler();
    }

    public void OnSourceDetected(SourceStateEventData eventData)
    {
    }

    public void OnSourceLost(SourceStateEventData eventData)
    {
        if (!isHold) return;

        isHold = false;
        InputManager.Instance.PopModalInputHandler();
    }
}
今回は、以前の移動時と違い手の位置を取れるように
IInputHandler、ISourceStateHandlerを使いました。
こちらの方が簡単でした。
あとは、各頂点にリサイズハンドルをコピーすればOKです。
最終的なHierarchyウィンドウは下図になります。

ここまでで拡大縮小が可能です。
対角点を基点にする
上記コードだと中心点が基点になって拡大縮小されますが
対角点を基点にしたいと思います。
以下のようにResizeController.csを変更します。
    void Update()
    {
        if (!isHold) return;

        ・・・

        targetObj.transform.localScale = startScale + new Vector3(diff.x * xVect, diff.y * yVect, diff.z * zVect);

        // 追加
        var scaleDiff = targetObj.transform.localScale - startScale;
        targetObj.transform.position = startPos + new Vector3(scaleDiff.x * xVect, scaleDiff.y * yVect, scaleDiff.z * zVect) / 2;
    }

    public void OnInputDown(InputEventData eventData)
    {
        ・・・

        startScale = targetObj.transform.localScale;
        // 追加
        startPos = targetObj.transform.position;

        axisVect = transform.position - targetObj.transform.position;
    }
拡大縮小しつつ同じ方向に移動しているので基点が対角点に見えます。
(もっと良い方法あるんですかね?)
それで今回作成したものはこんな感じに動きます。
hololens resize object
ワイヤーフレームやハンドルが一緒に拡大縮小しちゃうのが玉に瑕ですね。
課題は残しつつも一応変倍ができるようになりました。
後は回転ができれば基本的なオブジェクトの操作はできるようになりますね
弊社ではエンジニアを募集しています。
興味がある方は下記からエントリお願いします。
athome-inc.jp
